
Toilet tanks are the unsung heroes of our daily lives, and understanding, if they’re interchangeable, can be a major money-saver.
Whether you’re looking to replace an old tank or want to give your bathroom a facelift on a budget, this article will explain why the answer may surprise you!
So, Are Toilet Tanks Interchangeable?
Yes, toilet tanks are interchangeable. The two most common types of toilets in the U.S. are 12″ rough-in and 10″ rough-in toilets, and many toilet tank models can fit both sizes with the help of a conversion kit. Additionally, there is an array of universal replacement tanks available that will fit almost any standard-size opening regardless of brand or style.
Can Toilet Tanks & Bowls Be Interchanged?
When it comes to toilets, there is a common misconception that toilet tanks and bowls can be interchangeable. Unfortunately, this is not the case. A toilet tank and bowl are two different components of the same fixture and cannot be swapped out without serious consequences.
Toilet tanks come in many shapes and sizes but all have one thing in common: they contain water used for flushing the waste away during use.
The shape, size, and design of the tank affects how much flush power it has – which directly impacts how effective your toilet will be at removing waste with just one flush.
On the other hand, a toilet bowl holds that waste until it gets flushed down into your plumbing system. It also must fit properly within your bathroom space since its size dictates where you place it in relation to surrounding fixtures such as walls or cabinets.
Differences:
The differences between these two essential parts mean that simply switching them won’t work for most installations.
Doing so could result in a poorly-functioning fixture or even costly damage due to incorrect sizing or improper connections between pieces like hoses for filling up the tank with water after each flush cycle completes.
Ultimately then, given their distinct roles within a functioning unit, we must conclude that toilet tanks and bowls are generally not interchangeable with each other without professional assistance from an experienced installer who understands local codes related to safety & installation requirements present in specific areas around homes & businesses alike.
Are all toilet fittings the same?
No, not all toilet fittings are the same. In fact, there are many different types of toilet fixtures available on the market today. Depending on your needs and preferences, you can choose from a wide range of shapes, sizes, styles and finishes to find one that fits your bathroom perfectly.
Variety of materials:
Toilet tanks come in a variety of materials such as stainless steel and porcelain-coated cast iron. They also vary in size with some being built into walls while others require additional floor space for installation.
The type of material used will determine its longevity as well as how easy it is to clean and maintain over time.
Additionally, some toilets have adjustable flush volumes depending on their design which helps conserve water by allowing users to adjust how much water is used for each flush when needed.
Compatible model:
When looking for a new toilet tank, it’s important to check if the model is compatible with any existing plumbing setup in your home or if modifications need to be made first before installation can take place.
Different models may also require specific mounting hardware so always double-check what’s included with the purchase before making the final decision.
With so many styles available nowadays however there are plenty of options out there that have been designed specifically for easy replacement without having to make major alterations beforehand!
Advantages of Replacing a Toilet Tank:
Replacing a toilet tank can be an easy and economical way to update the look of your bathroom or address any potential issues.
The old toilet tank may have been leaking, difficult to flush, or just aesthetically outdated.
Whatever the reason for replacing it, there are several advantages that come with installing a new one.
Advanced designs:
For starters, many modern toilet tanks feature advanced designs such as insulated tanks and dual-flush systems which dramatically reduce water consumption while providing dependable flushing performance.
Features like never-leak guarantees:
Additionally, most newer models include features like never-leak guarantees and anti-bacterial glazing which provides superior protection against microbial growth on surfaces inside the bowl – this is particularly important in areas where hygiene standards must be met.
More stylish:
Finally, updating your existing toilet tank with a more stylish model also offers aesthetic benefits that can really enhance the overall appearance of your bathroom space – making it look brighter and far more inviting than before! If you wanna change your shower learn Are Moen Shower Valves are Interchangeable?
Tools Required for Installing a New Toilet Tank:
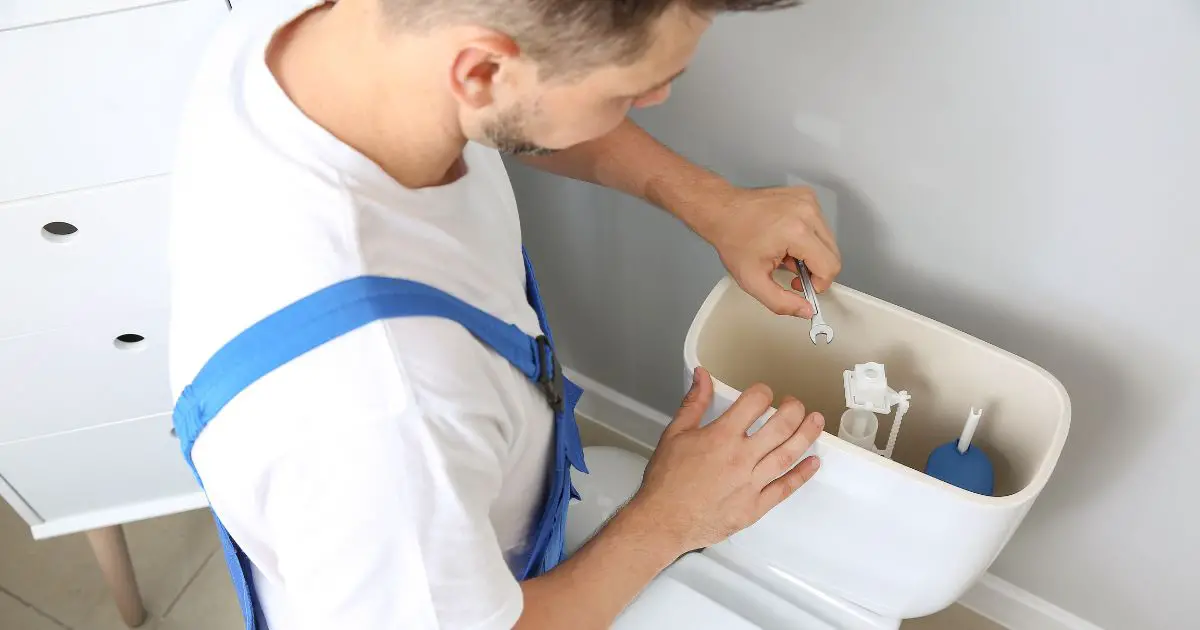
When replacing a toilet tank, it’s important to have the right tools. The most basic toolkit should include adjustable wrenches and channel-lock pliers for turning water supply valves and adjusting nuts that secure the fill valve and tank bolts.
An extra set of hands is also helpful when lifting heavier tanks into place.
In addition to these general tools, some specialized items are necessary for installing a new toilet tank, such as a wax ring or gasket sealant for creating an airtight connection between the bottom of the tank and the bowl.
A putty knife can come in handy for scraping off the old adhesive from surfaces before applying new wax rings or seals. And if you plan on working with metal tanks, having an electric drill with screwdriver bits is essential since they require screws rather than bolts like plastic models do.
Installing a new toilet tank doesn’t have to be daunting; just make sure you have all your tools gathered beforehand so work goes smoothly!
Removal of Old Tank Step-by-Step Guide:
Removal of an old tank is a relatively simple, but important step to take when replacing a toilet.
Before beginning the process, it is important to turn off the water supply and flush any remaining water out of the current tank.
In addition, make sure your workspace is well-ventilated as some tanks may contain asbestos or other hazardous materials.
- The first step in removing an old tank is detaching it from the wall by unscrewing any screws holding it in place.
- Next, disconnect any existing pipes connected to the tank before lifting it away from its base and removing completely from the area.
- To avoid damage to yourself or your surrounding environment, always use gloves and proper lifting technique during this stage of removal.
- Lastly, inspect for any visible leaks on both sides of where you disconnected pipes prior to moving onto installation of new fixtures.
By following these steps carefully you can easily remove your old toilet tank without causing harm or additional complications down the line – such as plumbing problems due leaking connections!
Installation of NewToilet Tank Step-by-Step Guide:
Installing a new toilet tank is relatively straightforward, however, it can be time-consuming. To ensure that the installation process is successful and efficient, it’s important to follow all steps carefully.
Turn off the water supply:
The first step in installing a new toilet tank is to turn off the water supply and flush the existing toilet until there is no more water remaining in the bowl or tank. This will minimize any mess that may occur during installation.
Loosen and detach the bolts:
Next, loosen and detach the bolts connecting the old tank to its base before removing both pieces of equipment from their positions on either side of your existing toilet bowl.
Use an adjustable wrench:
Then use an adjustable wrench to unscrew and remove any parts or components connected with plumbing from your current tank before discarding them safely.
Begin attaching your newly purchased replacement tank:
After this initial prep work has been completed, you can begin attaching your newly purchased replacement tank onto your existing white porcelain bowl using plumber’s tape or putty for a secure seal between these two components as well as other relevant washers/bolts if necessary (please refer to manufacturer’s instructions).
Reattach pipes and fixtures:
Lastly, reattach pipes and fixtures associated with plumbing systems being careful not to over-tighten anything so as not damage other components of which are integral for proper functionality of this piece of sanitary apparatus!
Can you replace a toilet tank without replacing the whole toilet?
Yes, it is possible to replace a toilet tank without necessarily replacing the whole toilet. This process may be relatively easy depending on the type of toilet you own and the extent of damage to your existing tank.
The first step in replacing just the tank is to turn off the water supply located behind or below your original unit.
You will then need to empty out any remaining water from inside before you can safely remove it.
From there, all that’s left is to carefully unscrew and detach all parts connected with bolts and screws so that you can take out your old tank while ensuring no pieces get damaged or lost along the way.
Once removed, cleaning surrounding areas can help make room for installation of a new one afterwards.
When selecting a replacement model, ensure that its shape fits properly onto your base before purchase; this will require measuring dimensions accurately so as not to engage in costly mistakes down the line too.
Lastly after purchasing suitable tools needed for assembly such as tanks bolts and washers, follow instructions carefully when installing them together (with rubber gaskets between) before connecting back up with the main water supply line again at last when done successfully!
Can you buy just the tank part of a toilet?
Toilet tanks are an essential part of the toilet that houses both the water supply for flushing, and the refill valve for refilling after each flush.
Often times, with age or due to wear and tear, the toilet tank may need replacing. Many people want to know if it is possible to purchase only the tank part of a toilet, without having to buy a whole new set.
The answer is yes- you can buy just the tank part of a toilet! Depending on your individual needs and model type, you can find pre-made replacement tanks online or in home improvement stores that are designed specifically for most popular types of toilets.
When purchasing these replacement tanks be sure to verify fitment as some models may require additional parts such as special washers or nuts that do not come included with purchase.
Summary and Tips on Replacing a ToiletTank
Replacing a toilet tank is an easy job that can be accomplished by most homeowners with basic plumbing knowledge.
The first step to replacing a tank is to purchase the new one and ensure it fits the existing base.
This involves measuring the width of the old tank, and purchasing one with similar dimensions in order for it to fit properly.
It’s recommendable to buy all necessary components at once, such as the flush lever, flapper valve, fill valve, wax ring, and bolts.
The second step is disconnecting the water supply from the bottom of the toilet by turning off the shutoff valves or unscrewing flexible supply lines connected to angle stop valves located behind or under the toilet bowl.
Once disconnected drain out the remaining water inside the tank by pressing down on the flush handle until empty then remove the holding bolts securing it onto the base using an adjustable wrench or socket set while gently lifting up on the tank itself until it is loose enough for removal.
Thirdly install new components in reverse order starting with the wax ring placed around the horn outlet at bottom of a bowl followed by positioning the replacement piece over the top of the ring before setting it down firmly into place.
While reconnecting any hoses back onto angle stops if applicable along with tightening hold-down nuts underneath the rim of the unit ensuring the tight connection between both pieces else could lead to leaks later on when refilling the water line again.
Finally, finish up the process by attaching the lid back onto the newly installed part along with installing flushing mechanisms including the button arm handle setup which should come already preassembled and ready to go after verifying the connections are secure.
Can turn the main source back on slowly and check the functionality opening-closing valve several times ensuring proper operation and full installation complete!