
Are you looking for solutions to your Moen Shower Valve Troubleshooting? Look no further! This article will provide you with tips and tricks on how to resolve any issues that may arise.
From determining the cause of a leaky valve to fixing a faulty handle, this guide has all the solutions needed so that you can get back in the shower as soon as possible.
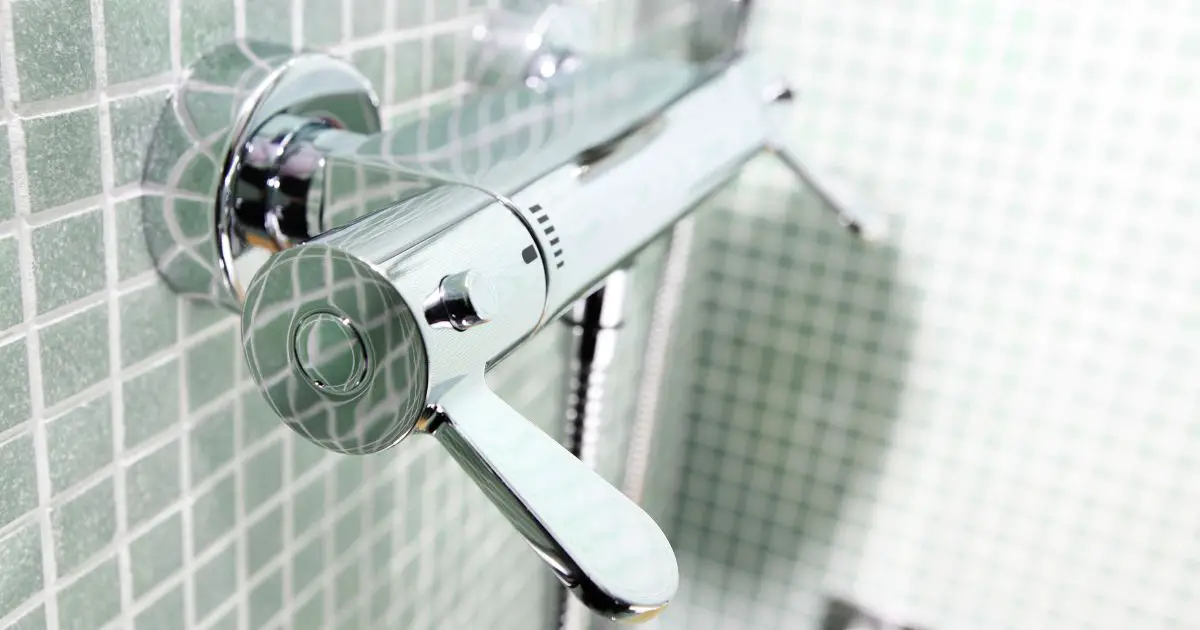
Moen Shower Valve Troubleshooting involves identifying and resolving common problems such as low water pressure, temperature fluctuations, or leaky valves. To begin troubleshooting your Moen shower valve, check for any blockages in the pipes before attempting to disassemble the valve. Additionally, inspect all of the O-rings for wear and tear and make sure they are properly lubricated. If these steps do not resolve your issue, consider replacing worn parts with genuine Moen replacement parts to ensure proper performance.
8 Common Moen Shower Valve Problems:
| Problem | Description | Troubleshooting Tips |
|---|---|---|
| No water or low water pressure | There may be a blockage in the valve or showerhead, or the water supply may be turned off. | Check for blockages in the valve or showerhead, make sure the water supply is turned on, and inspect the shut-off valve. |
| Water temperature not consistent | The temperature may fluctuate if there is a problem with the valve’s temperature control, or if the hot and cold water supplies are not properly balanced. | Check the temperature control on the valve, and adjust the hot and cold water supplies if necessary. |
| Leaking showerhead | The showerhead may be leaking due to a loose connection, a worn-out seal, or a damaged showerhead. | Tighten any loose connections, replace worn-out seals, or replace the showerhead if necessary. |
| Diverter not working properly | The diverter valve may be clogged or damaged, preventing water from flowing to the showerhead. | Clean or replace the diverter valve as needed. |
| Strange noises | The valve may make strange noises if there is a buildup of sediment or if the valve is damaged. | Flush the valve to remove any sediment, or replace the valve if necessary. |
| Handle difficult to turn | The valve handle may be difficult to turn if there is a buildup of sediment, or if the valve is damaged. | Flush the valve to remove any sediment, or replace the valve if necessary. |
| Valve not shutting off completely | The valve may not shut off completely if the cartridge is worn out or damaged. | Replace the cartridge if necessary. |
| Noisy water hammer | Water hammer occurs when the water flow suddenly stops or changes direction, causing a loud noise. This may be due to a loose or damaged valve, or improperly installed pipes. | Install water hammer arrestors or replace the valve if necessary, and ensure pipes are properly secured. |
Shower valves are an integral part of any shower experience. Unfortunately, they can be prone to a variety of problems. Here are nine common shower valve problems and what you need to know about each one:
1) Leaking –
If water is leaking from your shower valve, it could indicate that the washers or seals in the unit have worn out and need to be replaced. You should also check for signs of corrosion or other damage that may require repair.
2) Low Water Pressure –
Low water pressure can occur due to debris clogging up the pipes connected to your shower valve, as well as mineral deposits building up inside the valve itself over time.
Clearing away any blockages and having a professional inspect and clean the internal parts should help improve water pressure levels significantly.
3) Hot/Cold Mix Issues –
Some users find that their hot-cold mix is off balance when using their Moen Shower Valve, meaning they get either too much hot or cold water coming out at once without enough of both together.
This problem can usually be addressed by recalibrating the temperature control on the handle of your Moen Shower Valve so it more accurately mixes both temperatures together before releasing them into your shower sprayer head.
4) Strange Noises –
Strange noises like humming or vibrating suggest air pockets trapped in the plumbing lines connected to your Moen Shower Valve which will prevent proper flow through these pipes until released with some maintenance work from an experienced plumber.
5) Handle Stuck in Place –
Sometimes handles on older models may become stuck after years of wear and tear use; however, this issue can often be resolved with a good lubricant applied around its base near where it connects to its stem post underneath its escutcheon plate cover if accessible through inspection from beneath inside your wall cavity access panel area.
6) Unstable Temperature Changes –
While minor changes between hot-cold settings while adjusting throughout usage operations may not necessarily signify major issues, but rather just standard normal daily operation performance anomalies.
Sudden big swoops between extremely opposite states along with extremely poor combinations during particular times might mean something else entirely such as faulty internal components needing replacements soon.
7) Dripping After Use –
Post-usage dripping symptoms occurring within particular intervals signify possible faulty O-ring seals needing replacing right away before further buildups cause more serious damages later down the road.
Effective operational usages affect fixtures’ overall operations adversely eventually leading toward costly repairs requiring extra attention concerning all acute areas mentioned above first before proceeding elsewhere ensuring maximum results are obtained quickly upon arrival within the shortest timetables possible.
8 ) Flow Rates Outputs
Poorly performing outputs found under certain circumstances point towards possibly corroded rusty pipelines existing behind walls located within hard places transforming regular flow rates and considerably lowering peak performance records.
Especially when compared against newer updated hardware systems featuring improved technological advancements featured recently available today making products functions even better than previous generations utilizing the same setups albeit little differently
Moen Valve Cartridge Types and Removal:
Moen shower valve troubleshooting can involve many different issues, but one particular area of focus is the type and removal of Moen valve cartridges.
Moen manufactures a variety of cartridge types that are designed to fit their specific valves. Understanding the type and removal process for each is key when dealing with any Moen shower valve issues.
The two most common styles of Moen cartridge used in showers are the 1225 single-handle style and the 1200 or 1222 double-handle mixer style.
The 1225 Single Handle Style Cartridge has an easily identifiable flat head screw which is used to remove it from its housing, whereas with the Double Handle Mixer Style Cartridges (1200/1222) there is no visible screw on top so these must be pried out using appropriate tools such as pliers or a small flathead screwdriver.
It’s important to remember that both styles require special care when removing them as they are plastic components that may break if handled too roughly.
Once removed, inspect both cartridges carefully for any signs of damage such as gouges, cracks, or wear patterns which could indicate problems further down inside the valve itself.
If damaged parts are found then they should be replaced before proceeding further into your troubleshooting efforts; otherwise, you will likely end up repeating this same procedure again soon after!
Inspecting for Damaged Parts:
Inspecting for Damaged Parts is the first step in troubleshooting a Moen shower valve. It is important to check the entire system, including pipes, fittings, and valves, for any signs of damage such as cracks or corrosion. This can be done by visually inspecting each component or using various tools such as an infrared camera or a moisture meter.
If there are any visible damages that prevent water from flowing freely through the pipe system, these should be addressed before proceeding with further troubleshooting steps.
Also look out for calcification buildup on faucets and fixtures which can cause problems when controlling the water flow rate and temperature.
These components may need to be cleaned thoroughly with vinegar or other appropriate cleaning solutions before continuing with additional repairs.
Finally, it is important to inspect all parts of the shower valve itself for potential damage including fractures in metal parts or plastic pieces that have become brittle over time due to exposure to high temperatures or chemicals used in cleaning products.
Be sure to replace any damaged parts right away so as not to compromise the integrity of your plumbing system.
Replacing a Moen Shower Cartridge:
Replacing a Moen shower cartridge is one of the most common repair issues with Moen shower valves. The procedure for replacing a Moen cartridge is relatively simple and can be completed in under an hour with basic tools.
Before beginning, it’s important to identify which type of Moen valve you have. Most showers will have either a Single-Handle PosiTemp or a 12xx Series Cartridge.
These are typically identified by small numbers on the side of the handle or at the back of the faucet body that starts with “1” (PosiTemp) or “12” (12xx Series). It’s also important to determine if your current cartridge needs replacing due to wear and tear or damage – leaking, low water pressure, etc.
If you’re unsure whether it needs replacement, take pictures before removing so it can be compared against new parts when purchased.
Once you’ve determined what kind of valve and cartridge your shower has, turn off all hot and cold water lines leading into it.
The shutoff valves should be located near where the line enters the wall—then remove handles from the top plate by unscrewing the set screw using Allen key wrench.
If there isn’t one visible on the outside faceplate then look for an access hole underneath the handle itself by turning it over in hand (if present).
With this done loosen retaining screws around the edge holding together trim plates/valve assembly before finally removing the old cartridge from the inside housing using pliers.
Once removed compare the shape/size against the new part being used as replacement prior to the installation process starting again but in reversed order: insert the new part firmly into place until tight; reassemble trim pieces & handles.
Reconnect supply lines after ensuring everything is connected correctly before testing functions properly once all is finished.
Adjusting Temperature/Flow Settings:
Adjusting Temperature/Flow Settings is an important step for properly troubleshooting a Moen shower valve.
For optimum performance, it’s essential to adjust the temperature and flow settings of your Moen shower valve according to your specific needs.
- First, turn off the water supply to the valve by turning the shutoff valves counterclockwise until they stop.
- Next, with the handle in its full upright position, slowly rotate it from side-to-side allowing time for each setting before continuing on to their next desired setting (warm/hot).
- This will allow you to get used to how far you need to rotate in order for a certain setting or degree of water pressure.
- Additionally, without changing any handles’ positions, use a flathead screwdriver and insert it directly into the adjustment hole at the center of your handle’s stem; this will increase or decrease both temperature and flow accordingly by rotating either right (clockwise) or left (counter-clockwise).
- Lastly, if you experience excessive low pressure when using several fixtures simultaneously then you should consider installing a larger volume control module which can be purchased through one of our local dealers.
Troubleshooting Low Water Pressure Problems:
Troubleshooting low water pressure problems in a Moen Shower Valve can be quite challenging. However, with the right steps and attention to detail, you can easily identify and address any issues that may be present.
The first step is to check for any blockages or build-up in the pipes leading from your home’s main water supply line to the shower valve itself.
If there are any blocks or clogs present, try using a plunger or drain snake to remove them.
Additionally, if you notice corrosion on the inside of the pipes it may be necessary to replace them completely.
Next, inspect all parts of your Moen Shower Valve for signs of damage such as loose connections or deteriorated seals which could lead to leaking and ultimately cause low water pressure at the valve outlet.
If so, make sure these components are properly tightened and/or replaced before continuing further troubleshooting efforts.
Finally, inspect both hot and cold shutoff valves located near your home’s main water supply line for proper operation as one or both could be partially closed resulting in a reduced flow rate through your Moen Shower Valve causing lower than normal pressures at its outlet point.
Be sure these valves are fully open before completing troubleshooting efforts as they will need to remain that way while other possible causes like pipe size restrictions downstream from this point should also be considered when diagnosing low water pressure problems associated with a Moen Shower Valve system.
New Moen shower valve no water:
If you have recently installed a new Moen shower valve and there is no water coming out, it could be due to a few different issues.
First, check that the hot and cold water connections are secure and correctly connected. If this doesn’t solve the problem, you may need to check the inlet screens on both sides of the valve for any debris or blockage.
Another common issue with new Moen shower valves is air pockets trapped inside. To help remove them, open up your faucet all the way so that high-pressure forces out these gasses while also creating suction which can draw more air pockets out.
Finally, if all else fails you should inspect your shutoff valves to make sure they’re completely open as they may not have been turned far enough when initially installed or repairs were made.
You should also look at your main supply line for any kinks or obstructions in the pipe itself as well as inspect any other components involved in order to properly diagnose and fix whatever may be causing your lack of water flow from your new Moen shower valve
Can a Moen shower valve go bad?
Moen shower valves are known for their durability and long-lasting performance, but even the best products can go bad over time.
Moen shower valves are designed to withstand years of use, yet they may still eventually wear out or break down due to age and regular wear and tear.
Common signs that your Moen shower valve has gone bad include a decrease in water pressure, strange noises coming from the valve when it is turned on or off, water pooling near the base of the faucet after it has been shut off, and/or an increase in leaks around the area where the handle meets the body of the valve.
If you experience any of these problems with your Moen shower valve then it’s likely that something has gone wrong either internally with its components or externally via physical damage to the outside casing.
In some cases you may be able to replace certain parts such as washers inside your Moen shower valve instead of having to completely replace it; however, this will depend entirely on what type of problem you’re facing as well as how old your model is.
It’s advisable to consult an expert if you suspect that your Moen shower valve has gone bad so they can assess whether replacement parts would suffice before recommending complete replacement.
Moen shower valve not mixing properly:
Moen shower valves are designed to mix hot and cold water in order to provide a comfortable temperature for showers.
However, if the valve isn’t functioning properly, it can lead to discomfort or even injury due to scalding. Fortunately, troubleshooting this issue is relatively simple.
First, check that the handles of the shower valve are not cross-threaded or partially closed; this may be causing an imbalance in pressure between hot and cold water leading to inefficient mixing.
Additionally, inspect any O-rings on the faucet for wear and tear – if they appear damaged then replacing them could resolve your problem.
If these steps do not solve your issue then you should consider replacing your Moen cartridge with one designed specifically for your model of shower valve (the old one can be taken out using a pair of pliers).
If you notice that there is mineral build-up present around any seals or washers then it might be worth descaling them as well as part of good maintenance practice before installing a new cartridge.